Showing posts with label Home. Show all posts

Friday, March 23, 2018

Spring Shed Cleaning

It’s official—spring has sprung! That means it’s also time for the annual rite of spring cleaning. So make a plan to get organized this weekend. And since gardening season is upon us, why not start outside with your shed?

Begin by sorting through all of the stuff you’ve accumulated. Then decide what items should stay, keeping in mind that your shed should be home to tools and equipment you use for the lawn and garden. Relocate any items that don’t fit into that category.

The last step in your de-cluttering mission is to store everything so it’s easy to find and is protected from dirt, dampness, and pests. But before you rush out to buy storage supplies, check out the list below. There are plenty of items you probably already own that you can repurpose to keep your shed organized. Consider these possibilities:
  • Plastic sweater and shoe boxes—keep seed packets and gardening gloves clean and dry.
  • A magnetic knife rack—perfect for holding trowels, hand rakes, dibbles, and other small metallic tools on a shed wall.
  • Standing file holders—great for storing seed catalogs and garden magazines close at hand.
  • A hanging shoe organizer—fill the pouches with twist ties, balls of twine, spray bottles, and other small stuff that can quickly turn into a cluttered mess.
  • Ziplock plastic bags—stash seed packets, plant labels, and planting instructions in ‘em, then hang them with a binder clip on nails.
For more super secrets to clean up and declutter your whole house, check out our bestselling book, Can the Clutter! You can even try it FREE for a full 21 days with our Free Preview.

Friday, February 16, 2018

Roses are Red, Violets are Blue…

…And boy, do we have a sweet tip for you! We hope you had a lovely Valentine’s Day on Wednesday. And if you were lucky enough to receive a bouquet of beautiful roses from a loved one, you can make them last forever… Just turn them into this easy, scent-sational homemade potpourri: 
  1. After your flowers have fully opened but before the petals turn brown, remove all the petals from the stem. Gently lay them out in a single layer on a screen or cookie sheet.
  2. Allow the petals to dry out for a week or so away from any heat sources and sunlight.
  3. Once the petals are fully dried, place them in a jar with 1 teaspoon of rose essential oil for every 1 cup of petals.
  4. Put the lid on the jar and store it for 2 weeks, gently shaking the petals each day.
  5. Now all that’s left to do is place the potpourri in a pretty bowl and display it with pride! 
Find more flower tips and tricks (including a recipe for our Dazzling Basil Potpourri) in our bestselling book, Supermarket Super Gardens! You can even try it out absolutely FREE with our 21-Day Free Preview!

Friday, January 26, 2018

It’s Time to Ditch Dishwasher Germs!

You probably think of your dishwasher as a handy kitchen appliance that you can’t live without. But it’s so much more than that—it’s also your best defense against kitchen contaminants, as long as you’ve kept your “dry” cycle turned on. That “dry” cycle reaches a temperature of at least 170°F, which is the magic number when it comes to attacking harmful microbes that may be hanging onto your dishware. So if you’ve turned your “dry” cycle off in an effort to save energy, do yourself a favor, and switch it back on!

Also be sure to clean your dishwasher between cycles. Here’s a few easy ways to do so:
  • Pour 1 cup of white vinegar into a sturdy mug or bowl, set it in the top rack of your dishwasher, and run through a cycle on the hottest setting—with nothing else inside.
  • Cut greasy crud with a simple bleach treatment. Pour 1 cup of bleach into the bottom surface, and run it through a full cycle.
  • To tackle mineral deposits, use the bleach treatment (above), then when the cycle is finished, pour 1 cup of white vinegar into the bottom, and run it through again.
  • Freshen up the insides by using Coca-Cola® to clean up the crud. Pour a 2-liter bottle of the real thing (use the “classic,” not diet, version) into the bottom of your machine, and run it through a full cycle. And if the bottom tray is really grungy, let it soak for a few minutes before you start the cycle.
  • Denture-cleaning tablets will dissolve dishwasher grime in no time at all. So if you have plenty of tablets on hand, drop a couple in the bottom of your empty dishwasher, and run it through a regular cycle.
For more tips, tricks, and tonics for cleaning everything in your home, check out our bestselling book, Speed Cleaning Secrets! You can even try it out for FREE with our 21-day Free Preview!

Friday, December 15, 2017

Festive Fabric Fiesta


If you have a basket full of sewing scraps just waiting to be used, then this is for you! There are all kinds of creative ways to recycle those bits and pieces. Here are some of our favorite ways to give ’em new life for the holidays:

Trim the tree. Grab a couple bits of fabric and cut out two identical shapes (trees, snowmen, or star shapes all work well). Sew them together inside out, leaving one end open. Flip the little pouch right side out, and stuff it with cotton or bits of old pantyhose. Stitch it shut, attach a ribbon, and hang your homemade ornament on the tree!

Wrap presents. Use larger scraps in place of wrapping paper and tie them with braided bits of fabric or high-quality ribbon—the lucky gift recipient can even save the scraps to reuse themselves!

Tag it. Glue bits of fabric onto sturdy, solid-colored paper. Then, cut out fun shapes to make gift tags. Punch a hole in each tag, and secure them to your holiday gifts with colorful ribbons. Don’t forget to fill out the tags with a permanent marker!

Our bestselling book, Can the Clutter!, is full of terrific ways to reuse old “junk”…and it’ll save you a bundle! Try it out for FREE for a full 21 days with our Free Preview. And visit our Facebook page for more holiday helpers all season long!

Friday, December 08, 2017

Happy Holiday Houseplants

‘Tis the season for indoor gardening! So here are a few of our favorite tips, tricks, and (of course) trusty tonics that will keep your houseplants gorgeous, green, and growin’ all winter long:

Pretty up your plants. Never use water to clean the leaves of your houseplants. If your African violets, gloxinias, poinsettias, or other hairy-leaved plants are looking a little dusty, you can give them a gentle going-over with a soft baby’s hairbrush instead.

Get rid of the wrap. If you were lucky enough to receive a beautiful potted plant as a holiday gift, keep in mind that the colorful foil wrapping that covers the pot is just for display. It can actually be harmful if it’s left on too long, so make sure to remove it after a few days. Until that time, cut a small hole in the foil on the underside of the pot so excess water can still drain out.

Give poinsettias a boost. Keep them lush and lovely even after the holidays are gone with this power-packed potion: 1/4 cup of beer, 1/2 tbsp. of unflavored gelatin, 1/2 tbsp. of fish emulsion, 1/2 tbsp. of vitamin B1 plant starter, 1/2 tbsp. of ammonia, 1/2 tbsp. of instant tea granules, and 1 gal. of water. Mix it all up in a watering can, and use it every time your plants need a drink.

Spread the green. It’s easy to add to your plant collection—and you won’t even have to spend a dime! African violets, gloxinias, rex begonias, and peperomia are a few houseplants that root in a flash just from leaf cuttings. All you have to do is snip off a mature leaf with 2 or 3 inches of leafstalk attached, and insert the cutting into a new pot of soil. Make sure the leaf is standing straight up in the pot and that the cutting is planted deep enough that the leaf blades are touching the soil. As an added bonus, you might even get two or more new plants from a single leaf!

Feed your indoor garden. To keep your indoor herbs, veggies, and potted citrus trees happy and healthy all winter long (plus prevent pests!), mix up this terrific tonic in a handheld sprayer: 1 tbsp. of liquid kelp, 1/8 tsp. of dishwashing liquid, and 1 gal. of water. Then, just spray your plants every 2-3 weeks.

For more houseplant helpers and green growin’ secrets, check out our bestselling book, Green Thumb Magic. You can even try it out for FREE for a full 21 days with our Free Preview!

Friday, November 24, 2017

Turkey Day Leftovers With a Twist!

Hope you had a wonderful Thanksgiving yesterday filled with lots of fabulous food! And if you’re like us, you're now left with TONS of leftovers you've gotta eat up! But don't worry. We've got some easy, fast, and delicious ways to make your second-, third-, and even your fourth-day feast fun and oh-so tasty! Here are four of our favorite ways to enjoy Turkey Day leftovers:

Quick Quesadillas. Simply tuck turkey pieces, veggies, and cranberry sauce (or a drizzle of gravy if you'd prefer) between two tortillas, and heat the whole thing up in the oven.
Turkey Noodle Soup. Skinless turkey meat and leftover veggies are perfect additions to a hearty Fall soup. Boil any noodles you’d like, then add turkey broth and as much meat and veggies and you'd like!
Super Sandwich. Spread pureed squash or yams on slices of rye bread, then pile on a few cold turkey slices and some lettuce, tomato, and onion. Top with another slice of rye bread, and enjoy.
Thanksgiving Sliders. Grab a couple of leftover rolls, and slice them in half to make four buns. Add warmed up turkey and stuffing to each bottom bun, replace the top buns, then dollop with leftover cranberry sauce and a drizzle of hot gravy.

For more delicious recipes (that are good for your health to boot), check out our bestselling book, The New Healing Foods. You can even try it out for FREE for 21 days with our Free Preview!

Friday, November 17, 2017

Perfect Pumpkin Pie

Hooray! Thanksgiving is almost here! And that means it’s almost time for pumpkin pie—so what better time to share our favorite recipe? This pumpkin pie recipe is a wow-worthy winner when you use a traditional pie crust. But here’s a little secret: If you bake this filling in custard cups instead, you’ll have a power-packed dessert with only half the calories!

Ingredients

  • 2 cups canned pumpkin
  • 1 ½ cups evaporated skim milk
  • ½ cup packed brown sugar
  • ¼ cup sugar
  • 1 Tbsp. blackstrap molasses
  • ½ tsp. salt
  • 1 tsp. ground cinnamon
  • ¼ tsp. ground nutmeg
  • 1 pinch ground cloves
  • 2 large eggs, lightly beaten
  • 1 pie shell, or 6 custard cups

Directions

  • Preheat the oven to 300°F
  • In a large mixing bowl, combine the pumpkin, milk, sugars, molasses, salt, cinnamon, nutmeg, cloves, and eggs, and stir with a wire whisk until thoroughly blended
  • Ladle into your custard cups or prepared pie crust.
  • If baking in custard cups, arrange the cups on a rack set in a baking pan of hot water. The water should not go more than halfway up the sides of the cups.
  • If baking in a traditional pie crust, simply pop into the oven as usual.
  • Bake for 50 to 60 minutes, or until a knife inserted in the pie comes out clean. Chill before serving.
We hope you have a very Happy Thanksgiving! And for more mouth-watering recipes that will keep you young at any age, check out our bestselling book, Grow Younger, Live Longer. You can even try it out for FREE with our 21 Day Free Preview!

Friday, November 10, 2017

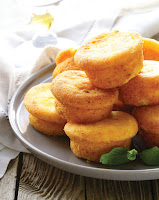
It's a Pumpkin Muffin Kind of Morning!

Here’s a terrific breakfast treat that’s sure to be a hit on any Fall morning. These Pumpkin Muffins taste and smell sinfully delicious, but the truth is, they’re good enough to be a part of a healthy, whole-grain diet because, believe it or not, they are only 159 calories each!

1½ cups white whole-wheat flour
2 teaspoons pumpkin pie spice
1 teaspoon baking soda
½ teaspoon baking powder
1 egg
1 cup canned pumpkin
½ cup honey
3 tablespoons canola oil
½ cup raisins

Preheat the oven to 350°F. Line a 12-cup muffin pan with paper liners. In a large bowl, combine the flour, pumpkin pie spice, baking soda, and baking powder. In a separate bowl, mix the egg, pumpkin, honey, and oil, until well blended. Pour the pumpkin mixture into the dry ingredients, and stir just until mixed. Fold in the raisins, and ladle the batter into the paper liners. Bake for 25 minutes, or until a toothpick inserted in the center of a muffin comes out clean. Enjoy!

For more tasty recipes that'll keep you healthy as a horse, check out our bestselling book, Grow Younger, Live Longer. It's got tons of tips and tricks that'll keep you young, healthy, and happy for years to come. You can even try it out for FREE with our Free Preview!

Friday, November 03, 2017

How Do You Like Them Apples?

Last week, we gave you five fabulous recipes using pumpkin…This week, we’re shining a spotlight onto Fall’s other star ingredient: Apples! So get out to your local apple orchard (or maybe just your backyard!) and pick a basket-full. Then, make up one of these dandy apple dishes…

Cheesy Apple English Muffin: Open an English muffin and place 2 apple slices on each side. Cover the apples with 2 slices of reduced-fat cheddar cheese, and toast in a toaster oven or under a broiler until the cheese is melted.

Roasted Apple Salad: Peel 2 apples, and slice them into wedges. Toss the apples with 2 tsp. of olive oil and ¼ tsp. of thyme. Bake the apples for 25-30 minutes at 400°F, turning once halfway through. Then, remove the apples, and let them cool. Toss 3 cups of spinach and 6 cups of mixed baby greens together, and drizzle with ½ cup of red wine vinaigrette dressing. Top with the roasted apples, 2/3 cup of shredded Swiss cheese, and ¼ cup chopped walnuts. (Makes 6 servings)

Chunky French Applesauce: Cut 1 apple into bite-sized chunks. Place the apple into a saucepan with a third cup of raisins, ¼ cup of chopped walnuts, ½ tsp. ground cinnamon, a pinch of ground nutmeg, and ½ cup of water. Bring everything to a boil. Cover, reduce heat to low, and simmer until apples are tender, stirring occasionally. Serve warm or cold over the top of grilled pork chops. (Makes 4 servings)

Amazing Apple Crisp: Peel, core, and slice 6 apples. Mix the apples in a bowl with ¾ cup of sugar, 2 Tbsp. lemon juice, 1 Tbsp. flour, and 1 tsp. cinnamon, then spread the mixture over a lightly greased 9-inch square pan. In another bowl, combine 1 cup of old-fashioned oats, ¾ cup brown sugar, ¾ cup melted butter, and ¼ tsp. baking soda. Mix well. Sprinkle the crumble evenly over the apples in the pan. Bake for 30 minutes at 375°F and serve warm, topped with vanilla ice cream. (Makes 8 servings)

For more delicious dishes that’ll also help keep you healthy at any age, check out our bestselling book, Grow Younger, Live Longer—See Chapter 8 for a whole bunch of family-friendly recipes! You can even try it out FREE for a full 21 days with our Free Preview.

Friday, October 27, 2017

4 Smashing Recipes (Starring Pumpkin)

Boo! Get ready for the spookiest time of the year—that’s right; Halloween is almost here. And what says “Happy Halloween” better than pumpkin, especially when it's on your plate!
Earlier, we covered how to prep and cook a pumpkin. If you missed it, head over to Jerry Baker Home, Health, and Garden on Facebook. (And while you’re there, don’t forget to like, follow, and share our page, too!)
Now that your pumpkin is out of the oven and pureed, you can pop it into containers and freeze it for later use, or you can enjoy it right away in one of these four tasty and amazing ways:
  • Savory Pumpkin Mash: Stir your mashed pumpkin with a little margarine, ground cinnamon, and skim milk, and eat it instead of plain old mashed potatoes. It goes perfectly with grilled poultry!
  • Sweet Pumpkin Puree: Sprinkle your pumpkin puree with pumpkin pie spice and chopped toasted pecans. Serve it with pork tenderloin for a delicious Fall dinner.
  • Pumpkin Pot Roast: Add a little salt and pepper to your pureed pumpkin, then pour it over lean pot roast like a gravy. So easy, so quick, and so yummy.
  • Berry Good Pumpkin Bowl: Season a bowl of warm pumpkin with ground ginger, and stir in some raisins or dried cranberries. Top with slices of baked chicken, and dig in!
Don’t worry, we’re not done yet—we’ve also got the best pumpkin seed recipe ever! These tiny treats are the perfect snack to munch on this season. And they’re also a good, concentrated source of zinc, a critical virus-fighter! Here’s how to make ‘em:
  • The Tastiest Toasted Pumpkin Seeds: Separate the seeds from any remaining pumpkin pulp by running them under water. Then, spread the seeds out on a cooking sheet in a single layer. Coat them with non-stick cooking spray, and sprinkle them lightly with salt (or garlic salt, if you’d like). Bake at 325°F for about 25 minutes or so, until toasted. Then gobble ‘em up!
We hope you enjoy these Fall Favorites! And for more tummy tempting ideas that’ll keep you in the pink of health, check out our bestselling book, Homemade Health. You can even try it FREE for 21 days with our Free Preview!

Friday, October 13, 2017

Easy DIY Gutter De-Gunk

Fall is here, the trees are changing, and before you know it, the leaves are going to start falling like crazy. And unfortunately, that means leaves piled on your lawn, all over your car, and especially stuck in your gutters—yuck! But don’t worry. We’ve got a no-fret, no-mess way to help you clean out your gutters fast—and all you need is an empty plastic bottle. Here’s our 5-step secret solution:

Start with an empty plastic bottle that’s no wider than your gutters (a fabric softener, detergent, or bleach bottle is perfect). Make sure it has a handle.
Rinse the bottle out, replace the cap, and lay it on its side with the handle facing up. Then, draw a diagonal line with permanent marker from one side of the lid to the base (see Figure 1 at right).

Use scissors or a sharp knife to cut along your guide line, and then continue cutting all the way around the bottle, matching the angle of the first side. And voila—you’ve made a handy-dandy homemade scoop! (See Figure 2 at right.)

Grab some garden gloves and an extension ladder, and dig into those gutters. Start by sliding your scoop along the gutter. Scrape up any and all leaves and debris. Just make sure you get down off the ladder and move it with you as you work, so you don’t lose your balance. And never, ever hang on to the gutter, or it could come loose!

Find even more super solutions for cleaning your whole house, inside and out, in our bestselling book, Speed Cleaning Secrets! It’s yours to try FREE for 21-days with our Free Preview.

Friday, September 15, 2017

Wallet-Friendly Fruits and Veggies

The end of summer is ripe with fantastic fruits and vegetables that are farm fresh, either from your local farmers’ market or grocery store produce aisle. And not only are the current crop wallet-friendly, they also taste their juiciest best! Here are the 5 best fruits and veggies you can buy fresh right now.
  1. Apples. Crispy, crunchy, sweet, and tangy, apples top the list of most folks’ favorite fruits. For the next few months, you’re sure to find your favorite variety readily available, and at its peak of ripeness. Scrub the skin clean and bite right in, or slice a few and add ‘em to a leafy green salad.
  2. Blueberries. These tasty treats are loaded with antioxidants that’ll help keep you in the pink of health. Eat them by the handful, or whirl them into a frozen yogurt smoothie.
  3. Cucumbers. Sure, you can find cukes year-round at the supermarket, but bagging them at your local farmers’ market makes ‘em taste extra fresh. Add thin slices to your sandwich to add zest and crunch, or toss them in a cold pasta salad for a late summer side dish.
  4. Nectarines. Summer’s sunniest delights are so juicy, sweet, and delicious, it’s hard to believe they’re good for you, too. But they are! Nectarines are loaded with beta-carotene, fiber, and vitamins A and C. Take a bite and get the juices flowing! Or finely chop one and stir the morsels into fiery salsa for a sweet-hot sensation that’s out of this world.
  5. Tomatoes. There’s nothing quite like biting into a tomato that’s still warm from the garden. But don’t worry if you didn’t grow your own this summer—just head out to the farmers’ market and bring home a bagful. Then slice ‘em, dice ‘em, and let ‘em brighten up your salads, pastas, and burgers.
For more ways to eat healthy without busting your budget, check out our bestselling book, It Pays to Be Cheap! Try it out for FREE for a full 21 days with our Free Preview. And don't forget to check out our website, and sign up for our Free E-Newsletter for exclusive special offers, new products, and more!

Friday, September 01, 2017

Labor-Free Laundry

Labor Day picnics are supposed to be fun and relaxing. So if your hot dog hoedown goes haywire, and you or your guests wind up with globs of mustard or ketchup on your clothing, don’t worry—just try one of these quick and easy fixes:
  • Scrub MUSTARD SPOTS with a solution of 1 teaspoon each of dishwashing liquid and white vinegar in ½ cup of water. Lay the stained area on top of an old absorbent towel, pour the solution onto the stain, and let it soak for about 10 minutes. Rinse the area with hot water, and then launder the item as usual.
  • KETCHUP STAINS are some of the easiest to remove. Just wet a sponge or paper towel with lukewarm water, add a dab of dishwashing liquid, squeeze the extra moisture out, and blot the spot. But whatever you do, don’t rub the stain—it’ll just drive it deeper into the fabric.
For more terrific grime-fighting secrets, check out our bestselling book, Speed Cleaning Secrets! This A-to-Z guide is chock full of super solutions that’ll help make any mess disappear right before your eyes! Try it out for 21 days with our Free Preview, and don't forget to sign up for our Free E-Newsletter for more amazing offers and first looks.

Friday, July 28, 2017

The Great Paper Plate

We all know that when you’re feeding a crowd at a big cookout or hosting a backyard birthday party for your kids, paper plates can save you a whole lot of cleanup time. But that’s not the only way this disposable, inexpensive, and super sturdy helper can come to your aid. Here are a few more handy hacks you can perform with a paper plate that'll make your life easier, cleaner, and less stressful...

In the Garden

  • Say “adios” to ants. Whether the tiny rascals are traipsing into your house or making mischief at your barbecue, serve up ultra-safe ant bait on a paper plate. When the bait’s all gone, toss the plate into the compost bin, or bury it in the garden. You’ll solve your pest problem and improve your soil at the same time.
  • Make sticky traps for flying bugs. Poke a hole near the edge of the plate, and thread a piece of wire through it. Coat the paper surface with corn syrup or petroleum jelly, and hang the trap on or next to a plagued plant. Every few days, remove the bug-covered plate and replace it with a fresh one.
  • Make a quickie bird feeder. Use thumbtacks to attach heavy-duty paper plates to your wooden porch railing or other sheltered spot, and scatter a handful of black oil sunflower seeds in each one.

Around the House

  • Catch paint drips. Before you start painting a ceiling, poke a hole in a paper plate and push your brush handle through. Then you’ll be sure that the paint will dribble onto the plate and not on your head.
  • Cushion your china. When ceramic plates are stacked on a shelf, the bottom of one can scratch the surface of the plate below. To keep that from happening, put paper plates between them.
  • Stop the splatter. Before you whip up your favorite goodies with your electric mixer, poke the straight end of the whisks through a paper plate (face down), and attach them to your mixer as usual. The plate will catch all the mess, so cleanup will be a cinch!

For more trash-to-treasure tips, garden growin’ magic, and critter controls, check out our bestselling book, Supermarket Super Gardens. You can even try it out FREE for 21 days!

Friday, July 21, 2017

Goodbye Grass Stains!

Ahhh, summer! The flowers are blooming, the sun is shining, and the grass is oh-so green. Unfortunately, so are the stains that are ground into the knees of your kids' favorite clothes! Here’s a laundry-basket-full of cleaning tricks that are sure to mow down grass stains:
  • Pour rubbing alcohol onto the stain, and let it soak for an hour. Then rub the wet spot with a sponge that’s been dampened with more rubbing alcohol, using a circular motion to lift the dye out of the fibers. Next, rub in some liquid detergent with color-safe bleach.
  • Rub some Karo® syrup directly into the stain with your fingers, and let it sit for about 15 minutes.
  • Soak the spots in a small bowl of whole milk for about 15 minutes. Scrub it with an old toothbrush, and let it soak for another 15 minutes.
  • Mix 1 cup of laundry detergent, 1 cup of ammonia, and 2 cups of water in a handheld sprayer bottle. Apply this solution directly to the stained area before tossing the clothes into the wash.
No matter which trick you try, always wash the item ASAP. Don’t let it dry, or the stain could set back in. Don’t wash a grass-stained item before you treat it, or that green may never disappear. And whatever you do, don’t put the clothing in the dryer until you’re sure all of the green is gone.

For more stain-bustin’ secrets, check out our bestselling book, Speed Cleaning Secrets! It’s jam-packed with smart tips and fast tricks that’ll make any mess disappear in a flash. Visit our website to try it out FREE for a full 21 days! And don’t forget to sign up for our Free E-newsletter—you’ll be the very first to find out about new products and exclusive offers. Plus, first-time subscribers get a special discount right off the bat!

Friday, June 23, 2017

Repurpose Plastic Bottles – 5 Easy Hacks!


You know that we here at Jerry Baker NEVER throw anything away if there’s a way to reuse it, especially if it’ll come in handy in the garden. So this week, we thought we’d spill the beans on some easy (and wacky) ways to recycle one common household item that everyone tends to toss – empty plastic bottles!

So before you throw out those used-up jugs of liquid laundry detergent, shampoo, dish soap, and more - hang on! Here’s how you can put ‘em to work in your yard and garden instead:

Deep irrigation system. Poke small holes in the bottoms and sides of the bottles, bury them in the soil at strategic spots in your garden, and fill them with water. The moisture will flow out at a slow, steady rate, directly to your plants’ roots, where it’s needed most.
Garden-tool caddy. Make a big hole in a giant bottle on the side opposite the handle. Then insert your trowel, pruning shears, and other small hand tools through the hole to carry them wherever they’re needed. 
Plant labels. Cut the sides of white or yellow bottles into strips, write on them with an indelible marker, and shove the strips into the soil next to the appropriate plants. 
Scoop. Cut diagonally across the bottom, screw the top back on, and use it to scoop up sand, fertilizer, compost, cat litter, or just about any other nonedible substance. 
Watering can. Drill a dozen or more holes in the cap of a giant bottle. Fill the bottle with water, and screw the top back on. To water your plants, flip the bottle upside down, and let the H2O flow! 

For more super secrets to help you reduce, reuse, and recycle, check out our bestselling book, Supermarket Super Gardens! You can try it out for FREE for a full 21 days (with NO obligation to buy) just by visiting our website. In no time, you’ll have hundreds of new uses for empty coffee cans, ripped panty hose, bent paper clips, old hoses, and more!

Friday, June 16, 2017

Have a Dandy Dad Day

It’s almost Father’s Day! And there’s nothing better than a good old-fashioned backyard cookout to cap off the fatherly festivities and spoil Dad rotten. But make sure no uninvited mosquitos march in to crash your party…Just arm your yard with this handy dandy Buzz Buster Lemonade, and you and your guests will be able to linger long after dessert to enjoy the cool night air…

Buzz Buster Lemonade: 
Put 1 cup each of lemon-scented ammonia and lemon-scented dishwashing liquid into a 20 gallon hose-end sprayer, and spray down everything in your yard three times a week (preferably in the morning) in the days leading up to the big day. Perform one last spray-down on the morning of the barbecue, and those vile villains will stay far, far away.

For more ways to send pesky pests packin’, check out our bestselling book, Critter Control & Pest Prevention—FREE for 21 days! It’s filled with a whole wheelbarrow of ways to kick ‘em outta Dodge—and keep ‘em out!

Thanks for reading! And from all of us here at Jerry Baker: Have a very Happy Father’s Day weekend!

Friday, June 09, 2017

Get the Most Brew for your Buck

Everyone loves a good homemade cuppa joe! But did you know that used coffee grounds can come in handy even AFTER the pot’s empty? That’s right! Here are five fresh-brewed ways to reuse those old grounds (and get double the bang for your buck!) all around your home and garden:

Freshen up a musty car overnight. Here’s a quick fix for clearing the air in a car that got damp: Cut the foot off an old pair of panty hose and fill it with used dry coffee grounds. Then tie a knot above the coffee and set the sack on the car’s dash or in the cup holder overnight. This trick will work like magic—in the morning the car will be fresh as a daisy.
Say “adios” to ants. Let your used grounds dry out, then divide them up between a few paper lunch bags and set the sacks wherever you’ve spotted ants inside your house. You can sprinkle loose grounds outside where you suspect they’re getting in. The coffee aroma will repel the ants, and if they happen to ingest the grounds, the caffeine will knock ‘em dead.
Fill in scuffs and scratches on wood furniture. Disguise nicks and dings by dipping a cotton swab in damp used coffee grounds and dabbing away at the scuffs. The tannins in the coffee will do a quick dye job, and no one will be the wiser.
Sweep out a garage without stirring up dust. Sprinkle damp coffee grounds across the garage floor before grabbing a broom. The weight of the grounds will keep the dirt and dust in check so cleanup will be a breeze.
Grow showier shrubs. Work a layer of your used coffee grounds into the dirt around your flowering bushes for the healthiest, most vigorous shrubs in the neighborhood. When they bloom, they’ll bloom big time!

For more terrific tips and money-saving secrets that'll give you the most bang for your buck, check out our bestselling book, It Pays to Be Cheap! Try out all the tricks without spending a dime—just sign up for our Free 21-day Preview!


Friday, May 26, 2017

Hosting a Memorial Day BBQ?

Hooray! It’s Memorial Day weekend! Warm summer weather is here in all its glory, so take full advantage of it by getting outside as much as you can. But before the gang arrives for the big holiday cookout, make sure your outdoor furniture is ready for company. Here’s how:

Sponge down aluminum furniture with a mix of warm water and dishwashing liquid. Pay particular attention to the joints and crevices of the frame, and sponge the cushions or webbing with the same mix to freshen up the seats. Finish by rinsing everything off with a garden hose until all the soap bubbles are gone. 
If a nearby shade tree has showered your patio furniture with sap or pollen, dissolve the sticky mess with a mix of 1 part glycerin and 1 part warm water. Wipe the furniture with a clean, moist sponge. 
To clean canvas chairs or chaises, wet the fabric with a garden hose, rub a scrub brush across a bar of soap, and give the canvas a good going–over. Rinse thoroughly, let the chairs air-dry, and you’re done. 
Spruce up grungy outdoor cushions by wiping them down with a mixture of 1 teaspoon of borax, 1 teaspoon of dishwasher detergent, and 4 cups of warm water, soaking the seams and creases. Let the solution sit for 15 minutes, then rinse it off with a garden hose. Set the cushions on end to air dry. 

You’ll find even more solutions for cleaning everything from A to Z in our jam-packed bestselling book, Speed Cleaning Secrets! It’s filled with over 2,000 terrific tips to get your whole house (indoors and out!) clean as a whistle. Just visit our website at www.jerrybaker.com to try it out for a full 21 days, absolutely FREE!

Happy Memorial Day!

Friday, May 12, 2017

Raccoons running rampant?


Don’t look now, but here come the critters to kick off their season of mischief making. Raccoons seem to be the wiliest of the bad guys—they’re agile, persistent, and smart. So whatever you do to make the rascals relocate, remember to change your tactics frequently. Otherwise, they’ll catch on to your game and you’ll be right back where you started.

The conniving creatures will eat just about anything they can get their little paws on. But corn, fruits, and berries of all kinds top the favorite list. Here are a few tricks that just might make the rascals ramble:
  • Raccoons hate the smell of both bleach and ammonia. So fill old margarine tubs or other small bowls with either aromatic liquid, and set them among your vulnerable plants. 
  • Keep ‘em out of your garbage cans by dipping a large wad of paper towels in ammonia, dowsing it with hot sauce, and tossing the wad into the can. 
  • Raccoons have hairless and very sensitive feet, and they don’t like to walk on anything that’s sticky, slippery, sharp, or just plain strange feeling. So lay a 3-foot-wide strip of any of these materials around your veggie patch, and those critters’ll clear out fast: broken pot shards or jagged stones; nylon netting; plastic sheeting; smooth, round pebbles; thorny rose or bramble fruit canes; wire mesh. 

For more super secrets, strategies, and solutions for battling garden thugs, check out our bestselling book, Critter Control & Pest Prevention—FREE for 21 days! It’s filled with just what you need to send pesky pests packin’—pronto!