Showing posts with label spring. Show all posts

Friday, April 13, 2018

Wake Up Your Lawn!

Now that spring has sprung, it’s the right time to get your lawn off on the right foot—er, root. And there’s no better way to do it than to apply our Spring Wake-Up Mix. Here’s how:

Mix 50 pounds of pelletized gypsum, 50 pounds of pelletized lime, 5 pounds of bonemeal, and 2 pounds of Epsom salts in a wheelbarrow. Apply the mixture to your lawn with a broadcast spreader no more than two weeks before your first fertilizing. This will help aerate the lawn, while giving it something to munch on until you start your regular feeding program.

Spring is also a super time to aerate your lawn. For best results, aerate the morning after you water the grass or after a heavy rain because the soil will be easier to penetrate then. First, poke holes in your soil easily with our Aerating Lawn Sandals. Then, put some sifted peat moss, dried manure, or compost in a broadcast spreader, and apply a layer about ¼ inch thick to the whole area.

For more spring lawn tips, check out our bestselling book, All-American Lawns. This amazing book is full of super solutions to help your turf rise, shine, and grow into the most gorgeous green grass you’ve ever seen! You can even try it out for FREE for a full 21 days with our Free Preview!



Friday, April 06, 2018

Give Your Lawn a Spring Spruce!

It was Opening Day last week for all your favorite Major League baseball teams! But how’s the turf at your home field looking? If your lawn is in desperate need of a spring cleaning, take some time between innings this weekend to get out there and give it a spruce: 
  1. Rake up the remains of last fall’s leaves and grass clippings.
  2. Overseed your lawn to repair any damaged areas.
  3. Follow with our sensational Spot Seed Tonic: Combine 1 cup of beer, 1 cup of baby shampoo, and 4 tablespoons of instant tea granules in a 20 Gallon Hose-End Sprayer, and lightly apply the mixture to the mulch covering your newly seeded areas.
  4. Remove thatch from cool-season lawns. Then spread screened compost over the dethatched turf.
  5. Follow the compost with a dose of our Kick-in-the-Grass Tonic: Mix 1 can of beer; ½ cup of Epsom salts; and 1 cup each of antiseptic mouthwash, dishwashing liquid, and ammonia in a large bucket. Pour the solution into a 20 Gallon Hose-End Sprayer, and apply the tonic to the point of run-off. After 2 weeks, administer another dose.
  6. Sharpen your mower blade, or replace it with a new one, so you’ll be all set for the first cut of the season.
For more ways to grow, repair, and maintain the best lawn in the league, check out our bestselling book, All-American Lawns. You can even try it out FREE for a full 21 days with our Free Preview!

Friday, March 30, 2018

Easter Egg Ornaments

Happy almost Easter! Here’s hoping you and yours have a wonderful celebration. And if you’re in the mood for some DIY decorating (that costs nothing!), here’s how you can use raw eggs to make extravagant, beautiful ornaments:
  • Using a needle, very carefully poke a hole at each end of a raw egg, making one hole a little larger than the other.
  • Hold the egg over a bowl, with the larger hole pointed down, and gently blow into the smaller hole, so the yolk and whites flow out.
  • Rinse the egg thoroughly with clear water, and lay it on paper towels to dry overnight.
  • The next day, decorate the eggs with paint, stickers, glitter, or whatever other decorative trimmings your heart desires.
  • For each ornament, thread the needle with a 12-inch length of embroidery floss or fishing line, and pull it through both holes in the egg. Tie a knot at the end that’s outside the smaller of the two holes. At the other end, tie a loop for hanging.
  • Spray the finished product with acrylic fixative, let dry, and hang wherever you need some Easter cheer!
For more terrific money-saving ideas using eggs and other ordinary, everyday items, check out our bestselling book, It Pays to Be Cheap. You can even try it out FREE for a full 21 days with our Free Preview!

Friday, March 09, 2018

Songbird Season

Migrating songbirds are a big thrill in the spring, and a birdbath that’s brimming with water is one of the best ways to entice them to visit—especially if you add the sound of flowing water to it with a dripper!

You can buy a dripper, or drip tube, at a bird-supply store for about $35, or you can easily make your own for free using an empty plastic juice jug. Here’s how:
  1. Thoroughly clean the jug, then using a straight pin, poke a pinhole in the bottom.
  2. Poke another tiny hole near the top for airflow.
  3. Fill the jug with water and replace the lid.
  4. Use fishing line or small-gauge wire to suspend the jug from a sturdy branch above your birdbath. Now you’ve got everything birds need to sip, splash, and stay awhile!
For more terrific tips and tricks to help you treat your fine-feathered friends, check out our bestselling book, Backyard Birdscaping Bonanza. You can even try it out absolutely FREE for 21 days with our Free Preview!

Friday, March 02, 2018

Spring Shrub Shopping

January may kick off the new year for most folks, but March is really where it’s at if you’re a die-hard gardener. From under your feet to high above your head, blooms will soon be bursting out all over! And one of the best spring activities if you’ve got a green thumb is visiting your local garden center to pick up some new plants. It’s an especially great time to buy early-flowering shrubs because you can see exactly what color their flowers are. Here are some other points to ponder as you shop:
  • Look for leaves that are healthy and free of dark spots or yellow patches.
  • Check that the potting soil is firm and free of weeds.
  • Avoid plants with visible pests, like aphids or scale.
  • Make sure the pot has a readable plant tag, so you know exactly what you’re buying!
Once you’ve made your selections and placed your new shrubs in the yard, give ‘em a dose of this homemade elixir: Mix 1 tablespoon of baby shampoo, 1 teaspoon of hydrated lime, and 1 teaspoon of iron sulfate in a bucket with 1 gallon of water. Then spray the elixir on all of your flowering shrubs to the point of run-off. It’ll give them the energy them need to produce as many flowers as possible.

For more tips on getting your spring garden off to a great start, check out our bestselling book, Green Thumb Magic. You can even try it absolutely FREE for a full 21 days with our Free Preview!

Thursday, May 18, 2017

It’s Time for Tomatoes!

There’s nothing better on a hot summer day than a ripe, juicy tomato, picked fresh from your own garden. And since things are finally heating up outside, it’s time to get those tomatoes going!

Here are two top ways to plant tomatoes:

The holey moley method: Simply dig a hole about the size of a soccer ball, and put a layer of compost or well-rotted manure mixed with a handful of bonemeal and 1 teaspoon of Epsom salts in the bottom. Then set in the plant so that only about the top 4 inches sticks up above the soil. (Clip off the lower leaves with scissors first.) 
The trench method: Make a 6-inch-deep trench the length of the planting bed. Spread a thin layer of compost along the bottom, then trim off the leaves from all but the top 4 inches of the stem. Lay each plant in the trench horizontally, with the 4-inch leafy part curved up out of the ground. Pack soil around it so it stays in place, and then cover up the rest of the stem with soil. 

After you’ve got your tomatoes planted...

It’s a good idea to set in some basil, bee balm, or borage close by. These aromatic herbs are the best neighbors your tomatoes will ever have because they send out chemicals from their roots and leaves that make tomato plants healthier and boost ‘em to new heights!

And if you want to get the most mouthwatering tomato crop on the block...

Treat your plants to a Tomato Booster Tonic. Just mix 2 tablespoons of Epsom salts, 1 teaspoon of baby shampoo, and 1 gallon of water in a watering can. Generously soak the soil around your tomato plants in early summer, just as they show a bunch of yellow flowers, to stimulate fruit set.


For more super secrets on growing big, juicy tomatoes and other incredible edibles, check out our bestselling book, Terrific Tomatoes, Sensational Spuds, and Mouth-Watering Melons. You can even try it out FREE for 21 days!

Friday, May 12, 2017

Raccoons running rampant?


Don’t look now, but here come the critters to kick off their season of mischief making. Raccoons seem to be the wiliest of the bad guys—they’re agile, persistent, and smart. So whatever you do to make the rascals relocate, remember to change your tactics frequently. Otherwise, they’ll catch on to your game and you’ll be right back where you started.

The conniving creatures will eat just about anything they can get their little paws on. But corn, fruits, and berries of all kinds top the favorite list. Here are a few tricks that just might make the rascals ramble:
  • Raccoons hate the smell of both bleach and ammonia. So fill old margarine tubs or other small bowls with either aromatic liquid, and set them among your vulnerable plants. 
  • Keep ‘em out of your garbage cans by dipping a large wad of paper towels in ammonia, dowsing it with hot sauce, and tossing the wad into the can. 
  • Raccoons have hairless and very sensitive feet, and they don’t like to walk on anything that’s sticky, slippery, sharp, or just plain strange feeling. So lay a 3-foot-wide strip of any of these materials around your veggie patch, and those critters’ll clear out fast: broken pot shards or jagged stones; nylon netting; plastic sheeting; smooth, round pebbles; thorny rose or bramble fruit canes; wire mesh. 

For more super secrets, strategies, and solutions for battling garden thugs, check out our bestselling book, Critter Control & Pest Prevention—FREE for 21 days! It’s filled with just what you need to send pesky pests packin’—pronto!

Friday, April 21, 2017

Happy Earth Day!

Tomorrow is Earth Day, and even though we only celebrate our planet once a year, it’s important to think green every day! Maybe your home is filled with stuff you’d normally throw away or toss in the recycling bin. Well, it’s time to change that way of thinking, and take a fresh look at your cast-offs to see how they could be reinvented in useful ways around your home.


For example, many first aid and health supplies come equipped with packaging that’s every bit as useful as the product itself (though in different ways, of course). Here are some examples of potential trash you can turn into treasure:

Boxes from bandages and gauze. Save these boxes until Christmas rolls around, then wrap them like tiny presents and hang them from the tree. You’ll have one-of-a-kind ornaments for free!
Cardboard rolls from gauze. Dismantle the nests of rubber bands in your junk drawer, and snap them around the empty roll. 
Plastic and metal boxes from throat lozenges. Use them to corral all kinds of tiny odds and ends, like buttons, nails, needles, paperclips, stamps…the list goes on and on. 
Reels from adhesive tape. Or any other kind of tape, for that matter. Wrap aluminum foil around the reels, attach a string to each one, and hang them in your fruit trees and berry bushes to discourage fruit-eating birds.
Any of the above. Turn it into dollhouse furniture. Just cover the box, reel, or roll with fabric or decorative paper, and presto! Depending on the size and shape of the object, you’ve got a bed, coffee table, dining table—or whatever your little interior designer desires.


Friday, April 14, 2017

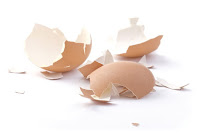
Reuse Your Easter Eggshells

Eggshells have more uses than you can shake the Easter Bunny at. So when you and your kiddies are done with your Easter eggs this weekend, don’t throw the shells away. This list of what you can do with them is only the tip of the cottontail:
  • Soak them in water overnight, and then water your plants with the calcium rich “tea.” 
  • Start seeds in eggshells. At transplant time, crack the shells and set the whole thing into the soil. 
  • Give them to the birds as a source of essential grit. Crumble the shells, and either mix them with the seed in your feeder or serve them as a side dish. 
  • Scatter crushed shells around plants to deter slugs, cutworms, and other crawling pests. 
Have a Happy Easter, and thanks for reading!

Friday, April 07, 2017

Suffering from Stuffy, Stale Smells?

Now’s the time to clear the air inside of your home after it’s been closed up all winter long. But if you use store-bought air-fresheners, all you’re doing is filling your home with chemicals. They also interfere with your sense of smell. Fortunately, there are many terrific natural alternatives to use instead:

Act with vim and vinegar. Just pour a little white vinegar into bowls, and set them around the problem areas. The acidic liquid will banish the unwanted smells pronto.
Burn your troubles away. Throw slices of dried citrus peel (your choice of flavors) into the fireplace. Your whole house will be filled with a wonderful fragrance.
Light a candle. Better yet, light several! But don’t bother with the fancy, scented kind. Like spray air-fresheners, they’ll add odor-masking chemicals to the air. On the other hand, a pure candle flame will simply burn away foul-smelling gases (even the ones that occur in bathrooms every now and then).
“Adopt” some houseplants. The more of them you have around your house, the cleaner and fresher your air will be. That’s because green plants naturally absorb and neutralize air pollutants. What’s more, they do an especially good job in small, enclosed rooms, where the air quality is usually the worst. Any kind of plant can perform this feat, but according to NASA scientists (who certainly know about tight spaces), the air-cleaning superstars are: aloe vera, chrysanthemums, English Ivy, fig trees, and spider plants.